Updated on March 5, 2019
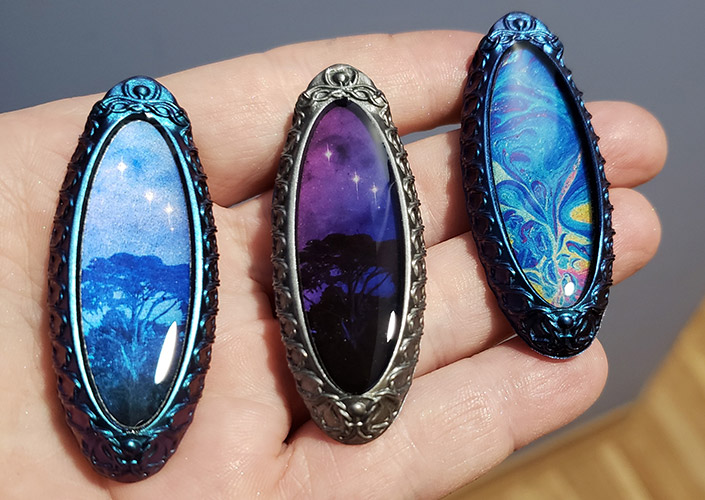
Have you ever wondered how to use 3D printing to make jewellery? Or make RTV silicone mold with 3D printed masters? We asked jeweller Warren Baird to give a high-level overview of the process and dive into a few areas to give some specific tips and advice on 3D printing molds for casting.
My name is Warren Baird, and I don’t particularly believe that bios should be in the third person. In some particular order, I am a father, a product manager for an interesting software company in the blockchain space, and an artist. I’ve been making visual art by creating digital composites of photos and images for many years. In 2015 I started turning my artwork into jewellery.
You can find more of my work on beautifulscience.ca and my Instagram page.
In 2017 I started to create my own bezels using 3D printed molds via services like Shapeways and 3DHubs. Later, in mid 2018 I leveled-up to doing my own 3D prints on a Kudo3D Bean – an LCD based resin 3D printer. In many ways I still consider myself a ‘noob’ at 3D printing. But, I think some of the tricks and techniques I’ve figured out might be useful to others.
First, I’ll give a high-level overview of my process. Then, I’ll dive into a few areas to give some specific tips and advice. Once I have a 3D model of the piece that I’m happy with, I 3D print it. That 3D printed model is called a “master”. Then, I create an ‘open-back’ mold by using a two-part RTV silicone. Then, I create a casting from the silicone mold with a 2-part resin. Finally, I add the image and some clear resin on top to make the final item.
3D model
I’m not going to talk here about how to create your 3D model, but I will give you one tip. In my experience cutting a straight, clean edge in silicone is extremely difficult. So, if you need a clean edge around your items, I’d highly recommend putting a ‘plate’ along the back of the item. When you make the silicone mold, it will give you a nice clean edge. Here’s an example of what the 3D model for one of my items looks like:

3D printing masters
3D printing masters for silicone molds with a resin 3D printer still feels as much like an art as a science to me. The details of getting a successful print can vary a lot depending on the shape of what you are trying to print, the printer you are using, and the resin you are using. For my items I’ve had the best luck 3D printing them “Standing up”, with the back of the item perpendicular to the build plate. Here’s an example of one of my items on the 3D printer before I remove it.
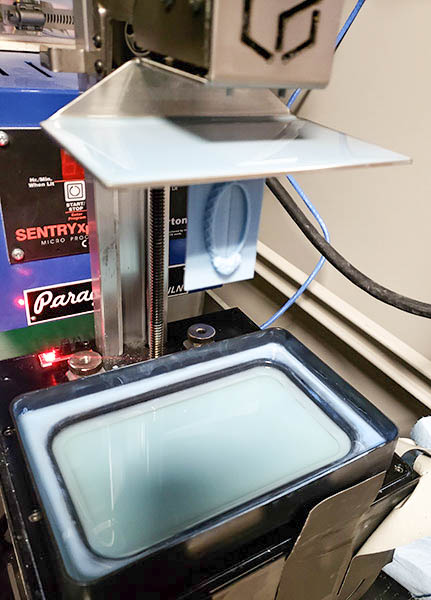
This does mean that 3D printing takes a long time. However, it also results in higher fidelity prints than any other orientation I tried. I’ve experimented with printing at Z resolutions ranging from 10 μm to 50 μm. and generally these days do most of my prints at 15 μm.
The print quality is noticeably better going from 25 μm to 15 μm. However, the difference between 15 μm and 10 μm is much smaller. This is pretty dependent on your model though. If you tend not to have much change in size as you move through the slices 25 μm or even 50 μm might be enough.
Exposure times will vary a lot depending on the 3D printing resin, and the Z resolution you use. Most of the resins I’ve used require 5 or 6 second exposures at 15 μm, 6 or 7 seconds at 25 μm, and 7-9 seconds at 50 μm. Although, recently I’ve begun 3D printing with the AmeraLabs AMD-3 resin, which is much faster. I’m currently using 1.4 s exposures at 15 μm, and 1.7 s at 25 μm.
Cleaning and post-curing
Although the AMD-3 resin is water washable, so far I’ve been using 99.9 % Isopropyl Alcohol to clean my prints. I use a 3-phase rinse – I have a container of ‘dirty’ alcohol, a container of ‘clean’ alcohol, and a spray bottle with unused alcohol. I put the item in the ‘dirty’ alcohol for a couple of minutes, giving it a swirl a couple of times, take it out and let it drain a bit. Then I put it in the ‘clean’ alcohol for a couple of minutes, again giving it a swirl or two, and then take it out. Finally, I give it a thorough dousing with the spray bottle, letting it drip into the ‘clean’ vat. After it’s dried off, I do a post-cure of the print for about 30 minutes. I use UV curing box that came with the printer.
Polishing
Despite the 3D printer having very good resolution, I generally find there are some areas on most prints that need polishing, especially curved areas. My polishing process starts with sanding. Depending on how noticeable the marks are, I’ll usually start sanding with either 400 or 600 grit, and then work my way up to 3000. My normal progression is 600, 800, 1000, 1200, 1500, 2000, 2500, then 3000 grit. After sanding I switch to a rotary tool (like a Dremel) with a cotton or muslin buff and green polishing compound.
After you’ve gone through this process it can be useful to take photos of the item. Zooming in a bit can help you see areas where you need to go back and touch things up. In the image below, you can see how one of my prints looked like straight out of the 3D printer (with a little bit of sanding started on the right). The bottom one is what it looked like after a single pass of sanding and polishing. You can see a few areas that still need additional attention.
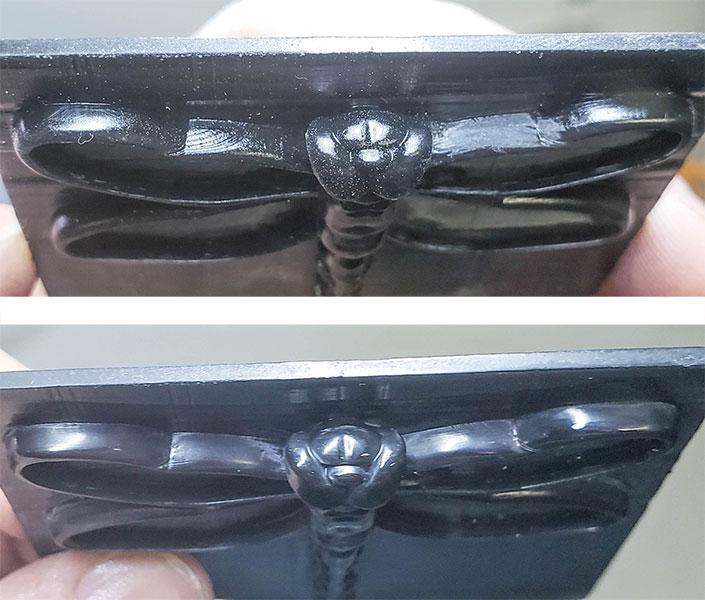
Note that RTV silicone molds will accurately reproduce the smallest scratch in the master. So, it’s worth spending some time on the sanding and polishing. I usually go back and do at least 2 or 3 rounds of spot sanding and polishing before I’m happy with the result.
Making silicone mold around your 3D printed master
There is a wide range of different silicones out there, but my experience is relatively limited. I make most of my silicone molds with Smooth-On Mold Star 20T – a ‘platinum-cure’ silicone. It is quite easy to work with and has a very low shrinkage rate of about 0.1 %. Some 3D printing resins seem to have additives in them that inhibit the curing of the silicone. They require substantial additional cleaning with alcohol after the polishing to ensure that the silicone cures properly. Although, the AMD-3 resin seems to work well as long as it had a 30 minute or so post-cure in UV light.
To make the silicone mold, I put the 3D print back-down in a small container, mix up enough silicone to cover the piece with about 1 cm of height above it, and pour the silicone in. I generally put the container into a vacuum chamber for about a minute to make sure there are no bubbles. If you don’t have a vacuum chamber you can usually get away with some tapping and tilting the container back and forth to release any air bubbles attached to the master. Some bubbles in the silicone isn’t a problem as long as none of them are directly stuck to the master. The silicone I use has a pot life of only 6 minutes, so you do need to move relatively fast at this stage.
Once the mold is cured, you can remove the master and cut away any excess silicone. After that you’ll have your silicone mold and be able to start making castings!
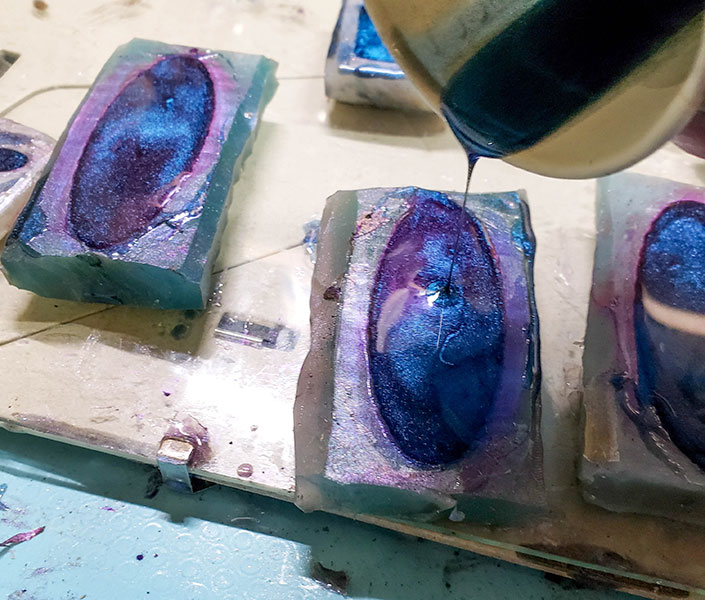
Casting
There’s an almost infinite number of different formulations of resins out there that you can use in the silicone mold. For my jewellery I tend to either use “Art Resin”, if I want a clear or tinted item, or Smooth-On’s Smooth Cast 325/326 for opaque items. I’ll often add pigments, tints or other additives for an interesting look. I do tend to use my vacuum chamber again here to ensure that there are no bubbles, but if you twist and tap the mold you can usually avoid getting bubbles in the final cast.
You will be able to make a lot of castings with your silicone mold. If you have a lot of fine details, eventually things may start to degrade. However, you should get into the 100’s of castings before having any problems. If you do eventually have issues, you can just create another silicone mold from your master.
Final words
I hope this has been helpful. If you have any questions, ask them below and I’ll do my best to answer them.
And if you wish to see more of my work visit beautifulscience.ca and my Instagram page.
Other articles from AmeraLabs
And if you have some spare time, check out other articles from AmeraLabs to learn even more:
- How to design parts for SLA 3D Printing
- 10 reasons why you get unexpected horizontal lines on your 3D printed parts
- ViLim Ball – therepeutic device with 3D printed housing
- 3D printed button for Porsche steering wheel
- 3D printed Linear Gear for Extensometer
- Attachment Layer in SLA 3D printing: what you need to know
Also, have a look at our SHOP. We have some great 3D printing resins to choose from!